
DTF transfers have gained significant popularity in various industries as a versatile and effective method of transferring designs onto different substrates. Whether you’re a DIY enthusiast, a small business owner, or a creative professional, understanding how to make DTF transfers opens up a world of possibilities for customization and branding. In this comprehensive guide, we will explore the step-by-step process of creating DTF transfers, from preparing the design to transferring it onto the substrate. Get ready to unleash your creativity and discover the art of DTF transfers.
How To Make Dtf Transfers?
Using A Dtf Printer:
- Select a high-quality DTF printer compatible with DTF transfer paper.
- Load the DTF transfer paper into the printer.
- Print your desired design onto the DTF transfer paper using the appropriate print settings.
- Allow the printed design to dry before proceeding to the transfer process.
Using A Heat Press And Dtf Powder:
- Print your design onto regular paper using a standard printer.
- Apply a layer of adhesive powder onto the printed design while the ink is still wet.
- Shake off the excess powder and place the printed design face-down onto the substrate.
- Use a heat press to transfer the design by applying heat and pressure according to the manufacturer’s instructions.
- Peel off the paper to reveal the transferred design on the substrate.
Using A Laminator And Dtf Film:
- Print your design onto DTF transfer paper using a standard printer.
- Cut out the design and remove any excess paper around it.
- Place the DTF transfer paper with the design facing up onto the substrate.
- Cover the design with a DTF film sheet.
- Pass the substrate, transfer paper, and film through a heated laminator, applying pressure.
- Peel off the transfer paper and film to reveal the transferred design.
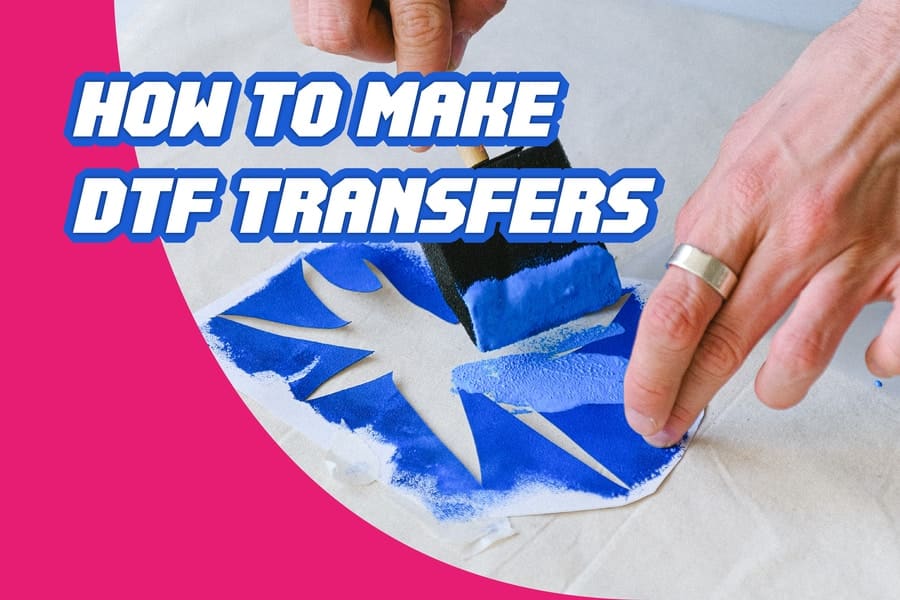
Using A Dtf Spray And Stencil:
- Create or obtain a stencil of your desired design.
- Place the stencil onto the substrate.
- Spray a DTF adhesive spray evenly over the stencil, ensuring full coverage.
- Remove the stencil carefully.
- Place the substrate with the adhesive spray in a heat press.
- Print your design onto DTF transfer paper using a standard printer.
- Place the DTF transfer paper with the design facing down onto the adhesive-covered substrate.
- Use the heat press to apply heat and pressure, transferring the design onto the substrate.
Using A Dtf Liquid And Transfer Tape:
- Print your design onto regular paper using a standard printer.
- Apply a layer of DTF liquid adhesive onto the printed design.
- Place transfer tape over the adhesive-covered design, ensuring a firm and smooth bond.
- Peel off the transfer tape with the design, which should now be adhered to it.
- Apply the design onto the substrate, using the transfer tape to position and press it firmly onto the surface.
- Remove the transfer tape, leaving the transferred design on the substrate.
Different Types Of Dtf Transfers
Different types of DTF transfers offer various options and techniques for transferring designs onto substrates. Here are four popular types of DTF transfers:
DTF heat transfers involve printing a design onto a special DTF transfer paper using a compatible printer. The design is then transferred onto the substrate using a heat press machine. Heat and pressure help the ink from the transfer paper adhere to the substrate, resulting in a vibrant and durable transfer. DTF heat transfers are commonly used for apparel decoration, including t-shirts, hoodies, and other fabric items.
DTF adhesive transfers utilize an adhesive layer to bond the design onto the substrate. After printing the design onto regular paper, an adhesive powder or liquid is applied to the printed design. The adhesive is then activated by heat or pressure, allowing it to adhere to the substrate. DTF adhesive transfers offer versatility and can be applied to various surfaces like wood, metal, glass, and ceramics.
DTF film transfers involve printing the design onto DTF transfer paper and using a laminator to transfer it onto the substrate. The printed design is covered with a DTF film sheet, and the substrate is sandwiched between the transfer paper and film. The laminator applies heat and pressure, allowing the design to transfer onto the substrate. DTF film transfers are commonly used for customizing items like mugs, phone cases, and promotional products.
DTF spray transfers involve using a DTF adhesive spray to transfer the design onto the substrate. A stencil is placed on the substrate, and the adhesive spray is applied over the stencil, creating a precise design. The stencil is then removed, and the DTF transfer paper with the printed design is placed on top of the adhesive-covered substrate. Heat and pressure from a heat press facilitate the transfer, resulting in a detailed and accurate design.
Tips For Optimizing Designs For Better Transfer Results
To optimize designs for better transfer results in DTF transfers, consider the following tips:
- Use High-Quality Images: Start with high-resolution images or graphics for your designs. Higher resolution ensures better clarity and detail in the final transfer. Avoid using low-quality or pixelated images, as they may result in a poor-quality transfer.
- Choose Suitable Colors: Consider the color scheme of your design and ensure that the colors you choose are compatible with the DTF transfer process. Vibrant and contrasting colors tend to yield better results. Test your design beforehand to check how the colors translate onto the substrate.
- Adjust Design Sizes: Scale your design appropriately to fit the desired substrate. Ensure that the design is neither too small nor too large for the intended transfer area. Keep in mind that resizing may affect the level of detail, so make adjustments carefully.
- Simplify Complex Designs: Intricate or highly detailed designs may not transfer well, especially in smaller sizes. Simplify complex designs by reducing the number of fine lines, small elements, and intricate patterns. This helps ensure that the transfer remains clear and legible.
- Test Print on Regular Paper: Before printing on the DTF transfer paper, test your design on regular paper first. This allows you to evaluate the colors, size, and overall appearance of the design before committing it to the transfer paper.
- Optimize Print Settings: Adjust the print settings of your printer to optimize the quality of the printed design. Experiment with different settings, such as print density, color profiles, and ink saturation, to achieve the desired results. Consult the printer’s user manual or manufacturer’s guidelines for recommended settings.
- Consider Layering and Overlays: If your design involves multiple layers or overlays, plan them carefully. Ensure that each layer is properly aligned and timed during the transfer process. Layering can add depth and complexity to the design, but it requires precision and attention to detail.
- Pay Attention to Text and Fonts: If your design includes text, choose fonts that are clear, readable, and appropriate for the intended size. Avoid using overly intricate or thin fonts that may not transfer well. Test the legibility of the text on a small-scale print before proceeding.
Troubleshooting Common Issues With Dtf Transfers
When working with DTF transfers, you may encounter certain issues that can affect the quality and success of your transfers. Here are some common issues that may arise and troubleshooting steps to help you overcome them:
1. Blurry or Fuzzy Transfers: Ensure that you are using high-resolution images or graphics for your designs. Check the print settings on your printer to ensure optimal print quality. Verify that the DTF transfer paper is compatible with your printer and adjust the paper settings accordingly. Double-check that the heat press settings are accurate, including temperature and pressure, as improper settings can result in blurry transfers.
2. Poor Adhesion: Confirm that you are using the correct type of DTF transfer medium for your substrate. Ensure that the substrate surface is clean and free from any dirt, oils, or residues that may hinder adhesion. Adjust the heat press settings, including temperature and pressure, as insufficient heat or pressure can lead to poor adhesion. Consider applying a base layer or primer on the substrate before transferring the design to improve adhesion.
3. Color Inconsistencies or Fading: Check the ink cartridges in your printer to ensure they are not running low on ink or expired. Verify that the color profiles and settings in your printer software are properly calibrated for accurate color reproduction. Ensure that you are using high-quality DTF transfer paper and that it is compatible with your printer and ink type. Consider performing test prints and adjusting color settings to achieve the desired color accuracy before transferring onto the final substrate.
Final Words
In conclusion, mastering the art of DTF transfers opens up a world of creative possibilities. By following best practices, optimizing designs, and troubleshooting common issues, you can achieve high-quality and professional results. Remember to use high-resolution images, choose suitable colors, and test your designs before transferring them onto the substrate. Don’t hesitate to experiment, learn from your mistakes, and seek guidance when needed. With practice and persistence, you’ll unlock the full potential of DTF transfers and create stunning custom designs on a wide range of substrates.
FAQ’s
What Substrates Are Compatible With Dtf Transfers?
DTF transfers can be applied to various substrates, including fabrics (such as cotton, polyester, and blends), ceramics, glass, metal, wood, and certain plastics. It’s important to choose the appropriate DTF transfer medium and adjust the process based on the specific substrate to achieve optimal adhesion and durability.
Can Dtf Transfers Be Washed Or Ironed?
Yes, DTF transfers are typically washable and can withstand normal laundering. However, it’s important to follow the care instructions specific to the substrate and transfer medium used. For fabric items, washing inside out in cold water and avoiding harsh detergents or bleach can help prolong the life of the transfer. Ironing should be done carefully, preferably on the reverse side or with a protective cloth to avoid direct heat on the transfer.
Can Dtf Transfers Be Used On Dark-Colored Fabrics?
Yes, DTF transfers can be used on dark-colored fabrics. However, the choice of transfer medium and ink colors is crucial for achieving good visibility and vibrancy. White or light-colored designs work best on dark fabrics, and special white ink formulations are often used as a base layer to enhance color visibility. Pre-treating the fabric with a base layer or primer specific to dark fabrics may also be necessary for optimal results.
Can Dtf Transfers Be Applied To Uneven Or Textured Surfaces?
DTF transfers work best on smooth and even surfaces, as they require proper contact and adhesion. Textured or highly uneven surfaces may pose challenges for achieving a seamless transfer. It’s recommended to choose substrates with relatively flat and smooth areas for the best results. However, certain textured substrates, such as canvas or textured papers, can still be suitable for DTF transfers, depending on the specific design and transfer method used.
Can Dtf Transfers Be Layered Or Overlapped?
Yes, DTF transfers can be layered or overlapped to create intricate designs and multiple color effects. Layering can add depth and complexity to your designs, allowing you to create unique visual effects. When layering, it’s important to ensure proper alignment and timing during the transfer process to achieve precise and accurate results. Testing and experimentation are key to mastering the layering technique and achieving the desired outcome.


